Showing posts with label Saving Money. Show all posts

Thursday, January 24, 2013

Investing In Your Health


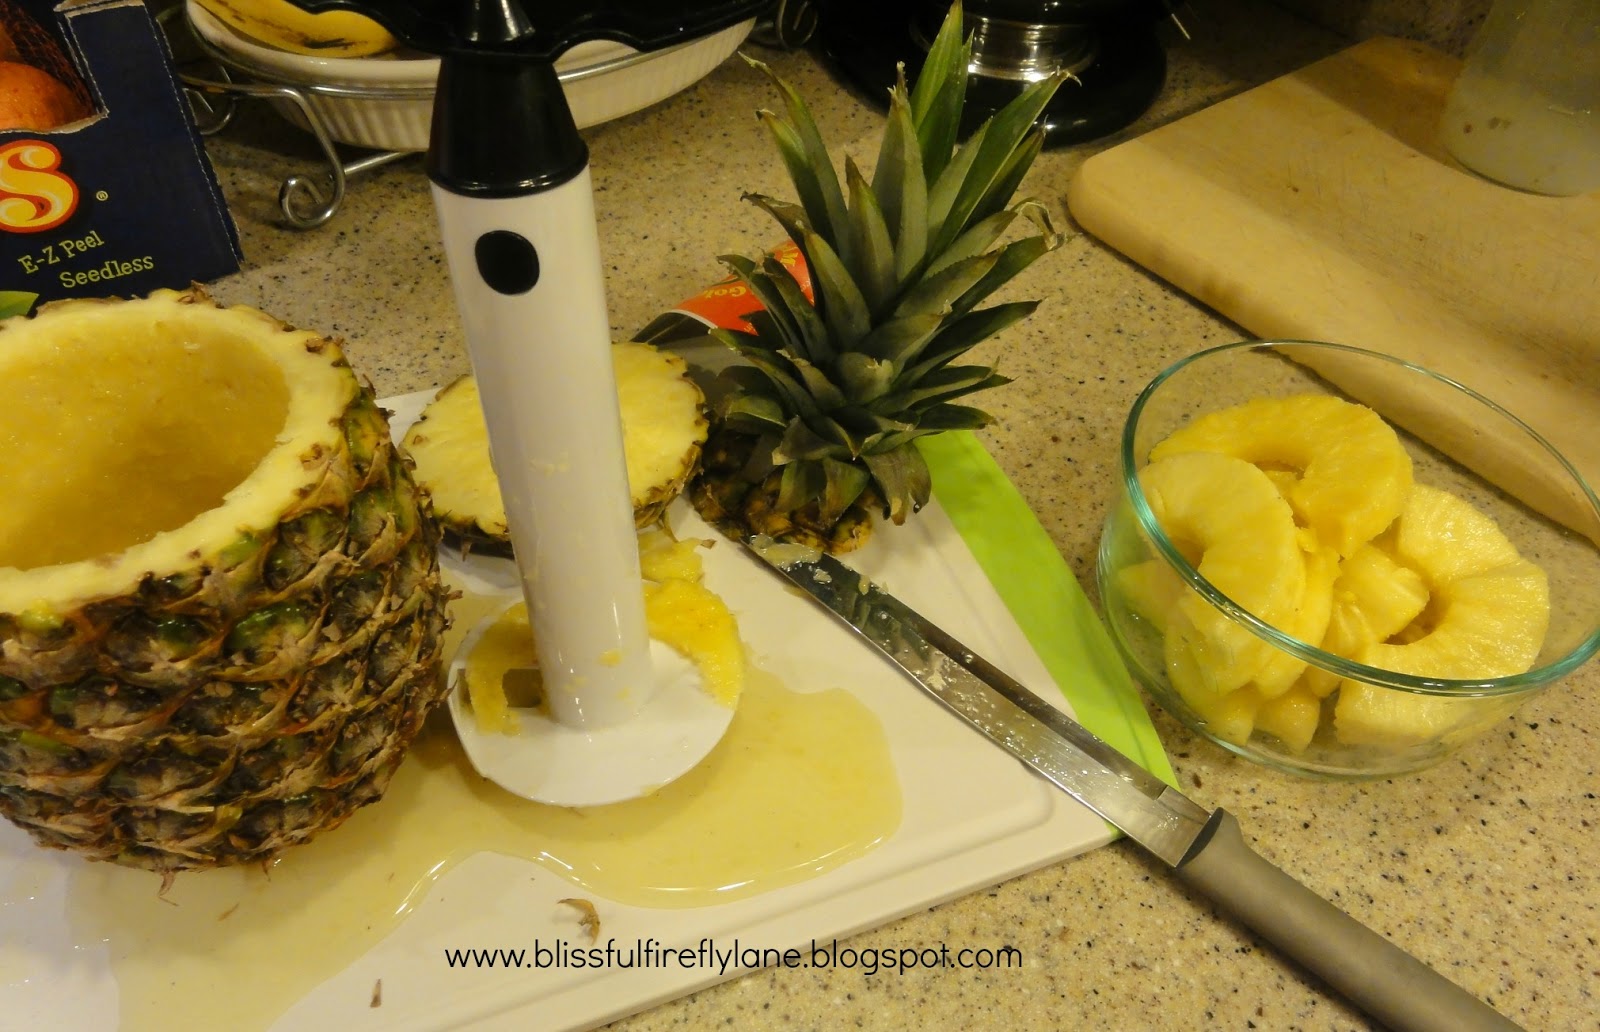
Isn't this picture beautiful?  Maybe it only is to me, but we LOVE fruit in this house.  We call it natures candy.  Who needs a snickers when you can have this healthy NATURAL sweetness?  Not me!  

I'm sure you have heard the old saying "An apple a day keeps the doctor away."  I tend to believe this is true because fruit is packed full of vitamin, minerals, and fiber.  All of these things are important to our health.  Fruit also has phytochemicals which can help in fighting against cancer, diabetes, high blood pressure, and heart disease.  Sounds like eating fruit is a no brainer, so why don't people eat enough?

I always hear the excuse that fruit is expensive...organic fruit especially.  I USED TO BE ONE OF THESE PEOPLE!  I'm a bit ashamed of it now that I look back.  


Would you rather eat the top picture, or the bottom?  I for one would MUCH rather eat the bottom picture.  For those who think the bottom picture costs more...think again.  For my husband and I to eat fast food, three times a day, it would cost us roughly $40 ($10 breakfast and $15 for lunch and dinner).  Sure it would be cheaper if we ate off the value menu, but I know that wouldn't happen.  This doesn't even include snacks and any other drinks we would want.

In other words, for us to eat all our meals out (fast food) for ONE week would cost us $280.  That is a lot for the little amount of food you get!  

Instead, we spend on average $75 a week on groceries (mostly unprocessed and organic).  Then I spend about $50 every 2-3 months at our local locker for meat.  For the sake of easy math let's say I spend $20 a month on meat.  That is $95 a week on groceries for two people.  We eat all breakfasts at home.  I eat lunch at home and my husband takes his lunch to work.  I make 5-6 dinners at home a week for us as well. 

For $95 we are able to eat most meals from scratch.  We are eating healthy and saving money!  I know that grocery prices depend on region and store, but I think we can all agree that eating at home saves money and saves on our health.

I think it is important to look at healthy unprocessed foods as an investment in our health.  Sure I could get out of the grocery store for less money if I filled my cart with chips, cookies, and sugary cereals.  Is that really wise though? 

The next time you are in the grocery store and shocked by the cost of wholesome non processed foods STOP yourself.  Think of it as fueling your body in a natural way.  Are you tired of always going to the doctor?  Are you tired of feeling bloated and lethargic?  Are you tired of your kids bouncing off the walls with all the sugar they consume?  Changing your diet can help alleviate all of this!  You are investing in your families overall well being.  :) 

Tuesday, January 15, 2013

Saving Money on Lunch

Did you know that lunch time is where a lot of Americans waste money and calories?  When you are working it is so easy to just grab something on your morning/afternoon break and lunch break.  

My husbands place of employment is a perfect example of this!  Everyday 95% of the people he works with go down to the gas stations for their morning break.  Then at lunch they generally go back to the gas station, or order burgers from one of the restaurants in town. 

They figured on average they are spending at least $10 a day on food and pop.  That is $50 a week, or $200 a month!  Oy!  Those numbers are on the conservative side as well.  

My husband works with no one who has a concept of a healthy lifestyle.  These guys live off cigarettes, beer, Mountain Dew, and Little Debbies.  No joke.  

In the last few years my husband has lost nearly 50lbs.  All of this has been done through proper diet and cutting out pop.  After seeing our family doctor last month he is now on a mission to maintain this wonderful weight loss.  She wants him losing no more weight because where he is at now is perfect and healthy.  I am so proud of him!  

One of the easiest ways to cut the fat is by....get this...are you waiting for it?  BRING YOUR OWN FOOD TO WORK!  :)  


Every night I pack his lunch for the following day.  For his morning snack he generally likes fruit, celery with peanut butter, or a homemade yogurt parfait.  For lunch I generally just make extra of what we had for dinner the night before.  If we have no leftovers then he LOVES salads.  I wish I loved salads as much as he did!  Otherwise, sometimes he will request a couple peanut butter and jelly sandwiches.  Nothing fancy here!  

He also only drinks water at work.  We have a reverse osmosis system and a filtered water pitcher at home.  He takes a 32oz water jug with him in the morning and drinks that at his desk until lunch.  Then he will drink the 24oz water bottle you see in the picture above.  

We save so much money just by him taking his snacks, lunch, and water to work everyday.  I am fortunate enough to be home by 1:00 in the afternoon, so I eat lunch at home as well.  I just can't imagine us spending $200+ a month on eating lunch out.  I think it is a waste of money and calories!  

Do you take your lunch to work? 

Tuesday, January 8, 2013

Healthy Smoothies

I absolutely love smoothies.  I love making them in the morning because they are healthy and packed full of protein.  Perfect for keeping baby and me healthy and fueled all morning long.  

There are tons of smoothie recipes out on the world wide web.  Some of them sound amazing to me and some of them sound down right gross.  I thought I would share my favorite smoothie combination with you.


To make two smoothies (one for my husband and I) I use:
 1 cup yogurt (try homemade!)
2 cups frozen fruit (we really like strawberries and blueberries)
2 scoops protein powder (I use this because it tastes the best and isn't gritty like some powders)
2 big handfuls of spinach (yup, I use spinach!  I promise you CANNOT taste it!)
and a splash of milk


Blend everything up until it is smooth and creamy.  

Voila you have the perfect smoothie with out all the added sugars and cost!  Buying smoothies at specialty shops is EXPENSIVE!  I make my own to stay healthy and save money.  :)

The blueberries and spinach are both really high in antioxidants.  Again, I PROMISE you cannot taste the spinach.  :)  This would be a great way to sneak some veggies in your kids diet.  
 

Sunday, December 16, 2012

Easy $2 Gift Tutorial

This is such an easy gift idea and the best part is that it only costs $2!  If you are looking for a last minute gift, or need a little something extra check this out.  These would be perfect for co-workers, secret santa's, or just about female adult.  I guess you could give it to a guy too.  Especially, if he liked cooking.


The first thing you need is a pot holder and coordinating kitchen towel.  You can get these for $1 each at Dollar Tree! 


Put the pot holder "face down" and line the kitchen towel "face down" on top of the pot holder.  Make sure the center of the towel and center of the pot holder are lined up.  Once they are both lined up in the center I put a few pins in to secure it.  

Then you can either sew a straight stitch by hand, or I used my sewing machine for short work.  


Once the straight stitch is done snip the excess thread.  When you hold it up the pot holder will have the plain side facing outwards.  Bring the loop of the holder up and sew a button on to secure it.  This is not done in this picture because this was my mom's job. :)   I decided it would be ok to not show the button because I will not see these again to take pictures.  Once she is done with the buttons they have new homes. 


They are so easy to make!  I was able to get 10 of these done in less than an hour.  My mom then took them home and she will be sewing a big button on, so the loop can be hooked.  These are perfect for hanging on the door of your oven.  She plans on giving them to the people she works with.  

Let me know if you make these! 

This post is linked up to Frugal Tuesday Tip.  

Friday, December 14, 2012

Cards: Saving Money and Keeping Organized

Is it just me, or are cards outrageously priced?  I love looking at cards, but I just don't see the point of spending $4 on something people are going to throw away (or in my case recycle).  Over the past two years I have implemented a system that saves me time, stress, and money on the act of card giving.  :)

Do you want in on a little secret?  It is so easy and a no brainer!  I toyed with the idea of even writing about this because I feel that a lot of you might already do this, but I am going to share anyways.

1.  I HATE when I realize I missed a birthday or anniversary.  I feel bad sending a card late.  Or I really hate when I realize someone has a birthday in just a couple days and I won't be going to a store to get a card.  I live in the middle of nowhere, so just running to Walmart isn't an option most days.  

I have alleviated this problem by grabbing a free calender from my vets office every December.  :)  You might be thinking I am crazy, but I promise I am not.  This calendar hangs in my hallway I walk by SEVERAL times a day.  On this calender I write everyone's birthday/anniversary on the appropriate day and the number of years behind it. I just transfer everything off it from the previous year. 

This is awesome for me because I see this daily and I always try to scan it when I flip the page the beginning of the month.  The best part...it is free.  A LOT of places hand out free wall calenders as Thank You's during the holiday season.  Make sure to pick one up, or you can purchase them at anywhere.  


2.  I always have cards on hand!  I am a huge fan of those boxes of cards.  I like having birthday and sympathy ones on hand.  They come in handy and they have a wide variety of designs in each box.  Plus they are really affordable!  

I also have boxes of thank you's in the house.  I currently have my Shaklee Thank You's (not shown), regular, and baby Thank You's.  I found the baby ones at the Christian Book Store for 50% off!  I made sure I grabbed a few boxes.  You never know when someone might give you something and you need to drop them a little note.  It is the polite thing to do.  :)  

Next, I really like having a few Bridal Shower, Wedding, Mother's Day, ect cards on hand.  This way if I forget to get one at the store, or if a date sneaks up on me I have one on hand.  

I like going to places like Target and Walmart to get these cards because they have sections of $.99 and $.49 cards.  If I have a few extras then I am not wasting my time and gas driving 30 miles one way to purchase a card.  Saves time and money!  

Another thing I like to do is purchase my Christmas cards when they go on sale for the following year.  I can get a box of 12 for around a $1!  I always make sure I pick up a few boxes of my favorite designs.  

Do you like to spend a lot on cards?  I used to, but over the years I have changed my way of doing them.  I display them for the appropriate amount of time and then they get recycled.  I just don't like spending a lot on them and I don't like the clutter.

I actually think giving a box of mixed cards would be the PERFECT Christmas gift for a grandparent, or really anyone.  They have boxes where there are x number of birthday, sympathy, thank you, ect.  Plus they are fairly cheap.  Or you could always make your own cards and get creative!  

This has been linked up to Frugal Tuesday Tip

Wednesday, December 5, 2012

Homemade Yogurt

Do you remember me writing about my "green" goals a few weeks ago?  One of my goals was to cut even more processed junk out of my families diet. We have done a lot over these past few years, but there is ALWAYS room for improvement around here!  I am not ashamed to admit that I am far from perfect in living a natural lifestyle.  I strive to be as natural and healthy as possible, but I am a work in progress.  

About a year ago I bought a yogurt maker and used it a few times.  Then it got shoved to the back of my cabinet where it had long been forgotten.  I actually do not mind homemade yogurt at all.  I do add thawed frozen fruit to mine right before I eat it, but I think it tastes good.  It is really good in smoothies and homemade frozen yogurt (post on that coming soon)!  

If you are used to the sugar filled yogurt in the stores then it might take you a few tries to get a taste for it.  Otherwise, it tastes just as good as anything I have ever bought.

Tonight I thought it was time to pull that yogurt maker out again.  After all, I did write my goals down for the world to see.  At 5am I will be putting 6-6oz containers of delicious yogurt in the fridge.


There are many yogurt makers on the market.  This is the one I have and I think it works great.  I follow the instructions it came with.

  1. Pour 1qt. milk into a saucepan.  Heat milk until it boils, stirring occasionally.
  2. Remove pan from heat and all milk to cool to room temperature.  Pour into pitcher.
  3. Add 1/2 c. natural yogurt into the milk. (Use store bought, or some leftover from your previous batch).  Stir until well blended.  Do NOT add any sugars or flavorings in the yogurt making process.
  4. Pour evenly into jars.  Do NOT put lids on jars.
  5. Place the cover on the yogurt maker, plug in, and turn to desired cooking time.
  6. I cook mine for 10 hours because I like thick yogurt.  The shorter you cook it the thinner it will be.
  7. Once your yogurt maker dings it will automatically shut off.  
  8. Put the jars in the fridge for several hours until chilled.
I like to keep some thawed frozen fruit in the fridge, so I can add it and the juice into my yogurt.  Strawberry, mango and blueberry are my favorites!

Isn't homemade yogurt so easy to make?!  At the grocery store I pay $.99 for a 6oz container of organic yogurt.  CRAZY!  At home I can make it for about $.34 a container plus the cost of the fruit I add in.  That is a HUGE savings!  The yogurt maker pays for itself in no time.  

Now I know you do not have to have a yogurt maker to make yogurt.  I know there are sites where people make it using a crockpot and cooler.  If you want to try this method I would search YouTube.  

This is just another way I am trying to cut the junk out of our diets.  Plus I am saving money too!  Let me know if you try this, or if you already make your own.   This would be perfect to start your young kids on now.  That way they will never miss the sugary junk from the grocery store! 

This post is linked up with Frugal Tuesday Tip.

Thursday, November 8, 2012

Basic H2 Degreaser Testimonial

I am so excited to share this with you!  I recently had a VERY happy client send me a testimonial on how the Basic H2 Degreaser worked for her.  She is a very busy army wife who has two kids, two cats, and her husband has been deployed more than he has been home the past 3 years.  

She contacted me because she needed a way to simplify her life.  She was tired of using chemicals to clean her house.  It was not safe for her, the kids, or the cats.  She was introduced to Basic H2 and fell in love!  One cleaner to clean almost everything in her house!  She was also very excited to start saving money.  One bottle of the degreaser is only $0.17.

"My mother and I put Shaklee's Basic H to the test.  

I'm bad about cleaning my microwave.  I'm short and it's a pain to clean.  Sadly to say my Before Pictures are at least 3 months worth of "grime."  My mom and I decided to roll up our sleeves and tackle my microwave.  

All we did was spray the Basic H degreaser on the microwave and let it sit for a few minutes.  After those few short minutes, we just wiped the grime off the glass tray with a wash cloth.  There was no scrubbing at all.  The same can be said for the inside of the microwave.  There were a few little spots where we had to rub a little harder but there was no intense scrubbing at all.  The gunk just wiped off.  The whole microwave was clean in less then 10 minutes.  

And the best part is there were no fumes, no need to wear gloves, no fear of harsh chemicals.  Talk about amazing!

Talk about passing a test with flying colors!  All of my other cleaners went in the trash that very day.  :)"
 
Before

Before

After!!!

Before

After!!! 
After!!!
 Aren't her pictures amazing?!  I was so excited when she sent them to me.  Making the degreaser is extremely easy.

For degreasing:
Add 1 1/2 tsp. to 16 oz. of water. For bigger jobs, add 2 oz. to 1 gallon of water.
 
I just love testimonials.  :)  Having other people put the product to the test is the best way for everyone else to see how great something works.  
 
Want to order Basic H2?  No problem!  HERE is where you can find it.  

Wednesday, October 31, 2012

Cleaning Kids Toys

I tend to cringe when I see commercials using bleach to clean kids toys.  Toys get gross because kids put them in their mouths, have sticky fingers, and play outside.  I honestly do not want my child to put bleach in their mouth!

This last weekend my sister put Basic H2 to the test on my nieces toys.  She mixed 1/4tsp of the sample in 16oz of water to make the All-Purpose cleaner.  She sprayed the toys and wiped them off.  Viola!  It really is that simple AND it is SAFE!  

Before: You can't tell, but they are pretty dirty!

Sooooo Simple!

All clean! 
The bonus is that this only took not even 10 minutes to do.  The entire bottle you see in the above picture costs $0.03!  


Thank you for cleaning my sensory ball, Mommy!  


Monday, October 1, 2012

DYI Fall Centerpiece

I'm kicking off the week with a super EASY do-it-yourself craft.  Not only is this craft easy, but it is cheap!  Especially if you have some of the pieces already.


I made two (one for me and one for my mom), so you will see the supplies for both.

1. 1/2 gallon mason jar
2. Spanish Moss
3. Fall flowers
4. Fall embellishments
5.  1/2 paper towel roll
6. Raffia

The next step...use your imagination!  I used the paper towel roll so my flowers would be more stable.  You do not need to do this.  It just depends on what kind you use.  I used a plastic spoon to hold the roll in the center while I added the moss.  


 I think they turned out cute!  The one on the left is mine and the right is my moms.  Both of these together cost $15 because EVERYTHING was on sale at Hobby Lobby.  You NEVER pay full price at Hobby Lobby.  :)   If you do have a full price item make sure to print off their 40% coupon from the website!

What do you think?  Did my $15 and 30 minutes pay off?  To purchase an already made centerpiece I would be paying way more.  I have found that it pays off to do crafty projects yourself!

This post has been linked up to Frugal Tuesday Tip.

Sunday, September 23, 2012

Candle To Candy Dish...

This little girl may or may not have broken my candy dish recently....


She may look all innocent, but there IS a reason why we call her "Hurricane Olive".  Me being cheap and all, I decided to hit up Goodwill to find a new candy dish.  That was a joke!  I love Goodwill, but whenever I am looking for something specific I can never find it.  I bet if I went their tomorrow there would be 5 candy dishes for sale.  :/  Oh well, I got creative!

I love Slatkin and Co. candles, but they are expensive at $20 each full price!  I rarely buy them for full price.  Heck, I rarely buy them!  I generally just go to the BeanPod candle outlet.  A while ago I did decide to splurge a little on the Slatkin and Co. candles and got a few of them for 50% off.  $10 per candle is still steep in my book.  

I feel bad just throwing the candles away once they are burnt, so I decided to turn it into a candy dish.


 Step 1:  Get one used candle.  :)


 Step 2:  Put candle in the freezer overnight.  I think you might be able to get away with a few hours, but you want it so cold the remaining wax cracks.

Step 3:  Take a butter knife and pry the cracked pieces of wax out.  Once you get the first piece out the others come out really easily.

Step 4:  Wash candle in hot soapy water.  This will get the remaining wax particles out and the label off the front.  These candles have labels that come off really easily!

Step 5:  Even though I washed it by hand really well, it still smelled like candle.  I decided to put the jar and lid in the dishwasher.


Step 6: Take out of dishwasher and fill with your favorite candy!  I love how candy corn looks in jars. 

This is a really easy way to re-use something you would normally throw away.  You can use clean candle jars for so many things...office supplies, cotton balls, hair ties, ect.  Use your imagination! 

This post has been linked up to Frugal Tuesday Tip HERE!

Monday, September 17, 2012

White Chicken Chili

Are you ready for some severe deliciousness?!  Fall and winter months mean soup around here.  I love making homemade soup for a few reasons...

  1. It is delicious.
  2. I can control what is in it and the sodium.
  3. It is easy.
  4. I have leftovers to either freeze, or eat another night during the week.
  5. Soups are CHEAP to make!
Have you ever noticed how expensive soups are in restaurants?   I find it crazy that they charge about $3.50 for a cup of soup and nearly $5 for a bowl!  I can make a huge pot of soup for under $10 and mine tastes way better. 

One of our favorites is White Chicken Chili.  I don't have a specific recipe, but I tried to pay attention as I was making it.  You CAN'T mess soup up, so just play around with the spices until you get it how you like it. :)

Wendy's White Chicken Chili


In a large pot (I use my dutch oven) add 1T. EVOO and 1T. butter.  Let the butter melt and then add 1c. chopped celery and 1/2 a large onion.


Once the onions and celery start looking translucent add in one can of diced chili's.  I use mild or medium, but you can use whatever you want.  You can even add two cans if you want.  Then add in 1clove chopped garlic.


 After I give the chili's and garlic a quick stir I add in my chicken broth.  I used 5c. of homemade broth I had frozen.  I didn't have it thawed out, so I let it thaw in the pot.


 After my broth thawed I added 2 cups water (leave this out if you want a thicker chili).  Then I added a 48oz jar of Great Northern beans.  If you have dry beans you can use them.  Just soak them first and your cooking time will be longer.  Then I added 2 cups of shredded chicken.  I made a roasted chicken earlier that week, so mine was cooked.  You can use raw chicken if you plan on cooking it for a while.


Last, but not least...the seasoning!  Use whatever you want, but this is what we like.  Salt, pepper, a pinch of cayenne, and about 1-2 teaspoon(s) chili powder.  

I like to cook mine on low for a few hours.  If you are pressed for time then cook it at a higher temperature.  This is also a great crockpot meal.  

There you have it...a delicious, hearty, healthy soup for a few dollars.  If I had to estimate I would say I spent probably $5-$6 making this. 

Enjoy!

This post has been linked up to Frugal Tuesday Tip!

Sunday, September 16, 2012

My Veggie Wash

Do you know what scares me?  All of these food recalls!  It seems like every time I turn on the news a new fruit, or vegetable is being recalled for some nasty illness.  I think it is so important that people properly wash their produce and cook their meat properly.

Did you know that by running your produce under water isn't doing anything?  I actually had someone tell me they didn't need to wash their produce because it was organic!  Sick!  Think of all the hands touching it before you get it in your house.  People are harvesting it, packaging it, and grocery stores are putting it out for you to buy.  How many people touch that one apple before you buy it?  A lot and I'm pretty sure most of those people did not wash their hands.

I bet you will never guess what I use as an Organic Produce Wash.  I use Basic H2!!!  Yes, the same stuff that cleans my windows now washes my fruits and veggies.  


When I say this stuff is amazing and safe...I'm not joking!  I just fill my sink with some water.  Add 1/4 teaspoon under the water and wash my produce.  Then I rinse and dry them.  


The best part of using Basic H2 is the cost!  Would you rather spend $5 or $0.05?  I think that is a no brainer. 

If you are interested in getting your hands on this versatile cleaner PLEASE let me know! 


Wednesday, September 12, 2012

Cleaning Your Front Loader

Do you clean your washer?  I never really used to when I had my old top loader.  It just never got really dirty.  I would wipe around where the lid sat, but that was about all.  About 5.5 years ago my old washer and dryer both decided to die at the same time.  I would have to run the dryer 3 and 4 times just to get our towels dry.  Let's just say that isn't very energy efficient.  My old top loader then decided it would die in the middle of the cycle.  It was so frustrating!  

That is when I decided it was time to go to the appliance store in my small town.  Some 5+ years ago there wasn't much choice on what styles and brands.  Plus I was at my SMALL towns store, but I like to keep business local.  That is when I found my Whirlpool Duets.  Let me tell you they have come down in price A LOT since I bought mine so many years ago.  

All in all I love my front loader.  I really do, but it gets gross!  I have learned a few tricks over the years to keep this from happening.  

1. I try to clean my washer every 4-6 weeks.  

I take the detergent tray out and let it soak in a sink with 1/4 teaspoon Basic H2.  This stuff is amazing and cleans basically everything in my house!

2.  I add 1 Tablespoon of Basic G to the bleach compartment and run my washer on the CLEAN cycle.  


3.  I leave the door open after I take the wet clothes out.  It grosses me out to have the door closed while it is damp inside.  Mold can grow in there!  I also make sure to wipe out the door seal on occasion, but since using Basic G on a regular basis I don't have to very often.  Basic G is not only a germicide, but also a FUNGICIDE! 

4.  I use Shaklee's Get Clean Laundry products!  These products are amazing.  My husband and I both have sensitive skin.  My husbands especially!  When I was in college I bought Era brand detergent once because it was on sale.  I got a horrible blotchy rash on my torso from it!  
 
My husbands skin is so sensitive I had to start making my own detergent because he would basically get a chemical burn on his chest/back from commercial detergents.  Shaklee's products are even more natural than the ones I was making!  The powder costs about the same as the powder version I was making and Shaklee's products are a time saver for me. I know from experience that Shaklee's powdered detergent lasts MONTHS!
 
I used to use bleach on our whites.  Not anymore!  Shaklee's Nature Bright is AMAZING.  I have even gotten melted butter out of shirts (don't ask ;)).  


Do you clean your washer?  I think it is important to maintain expensive items.  No one wants to waste money, so if you take care of your possessions then they will last longer.  

Don't forget to enter my Basic H2 giveaway HERE!


Tuesday, September 11, 2012

Jet Dry

Hey everyone!  


Go check out how I have eliminated Jet Dry from my house!

Also, don't forget to enter my Giveaway HERE!


\


Friday, September 7, 2012

The 411 On Meal Planning

I LOVE meal planning.  Why?  Because it saves me time and money.  I may love to cook, but time just does not allow me to spend hours in the kitchen.  I have other things that need to be done like running my business, taking care of my home, and thousands of other things go along with that.  

Meal planning does not have to be a daunting task.  What works for me might not work for you.  All you need to do is follow my tips and use them in a way that best fits with your family.  Pretty simple.

  1. Be organized.  This may seem like common sense, but if your not organized you will not know what food is in your house.  Make sure your pantry, fridge, and freezer are all organized.  I like being able to open my pantry and seeing everything I have on hand.  Makes meal planning a breeze.  
  2. Keep staples on hand.  If your family loves spaghetti make sure you always have noodles and sauce on hand.  This way you will always have a quick "go to" meal. 
  3. Cook once, eat multiple times.  My favorite thing to do is make a crockpot rotisserie chicken during the beginning of the week.  Then I have leftover chicken to make other meals with.  Half of my work is done for me.  This is also great for lasagna, casseroles, and soups.  If you are making one, you might as well make 2 or 3.  Then you have your very own convenience food ready to go in your freezer.   Those store bought entrees are gross, filled with preservatives, and high in calories.  
  4. Become friends with your Crockpot.  I think Crockpots are so under rated.  These things preform magic in the kitchen.  They are perfect for any busy family.  I love getting my crockpot meal ready the night before, put the insert in the fridge, and turn it on in the morning.  I leave the house early some mornings and don't want to waste time prepping my food.  Do it the night before!  
  5. Base your grocery list off your meal plan.  I like having my meal plan right along side my grocery list.  I just jot it down on my list, so I can reference it and make sure I haven't forgotten anything.  
  6. Have a central command center.  It is really helpful if you post your meal plan where the entire family can see it.  The fridge is a perfect spot for this, or you can steal my picture frame idea.  This way you are sure to set out meat the night before, or prep a certain item the night before.  It just saves time.  Plus you won't have you kids (and husband) asking you what's for supper every day.  They can just look at the list.  
  7. Don't be a short order cook.  Some people might enjoy this, but not me.  I don't have time to make two separate meals.  I make sure I plan meals everyone will like.  If I'm trying a new recipe and we don't like it then that is what PB&J is for.  :)   Making one meal saves you both time and money.
  8. Set a grocery budget.  We don't have a set budget, but I know generally how much we will be spending each week/month at the grocery store, butcher, and Sam's Club.  It is like a game to me!  Plus it keeps me from purchasing a bunch of junk we don't need. 
  9. Allow one splurge item.  This might not go directly with meal planning, but I think it is important.  When you are grocery shopping allow yourself one item that isn't on your list.  I will be honest...this week I had three items.  But knowing I have one item to splurge on keeps me from going down every isle and filling my cart.  Once I put my item in the cart that is it.  I must now stick to my list the rest of the trip.  (i.e. a package of cookies, a cake mix, brownies)  
  10.  
$5 frame + Scrapbook paper + Wet Erase Marker = Meal Planning command center!
     
There you have it.  Those are my tips for successful meal planning.  Let me know if you do anything different.  Like I said this might not work for you, but find out what does.  I have been meal planning for years and it has changed my life.  I am a person that needs to be organized, or my entire day is off.  Pondering what to make at 5pm is not being organized.  I like a game plan. ;)

Be sure to check out my current giveaway HERE!

Thursday, September 6, 2012

Decorating With Jars

Can I let you in on a little secret?  I'm cheap!  I don't like spending a lot of money on decorating my house.  I like to shop garage sales, thrift stores, consignment stores, and retail sales.  I rarely pay full price on an item that is going to be decorating my house.

I think all of this stemmed in college.  I was finally on my own, had my own place, and wanted it decorated cute.  I prided myself on the fact that my apartments never looked like your typical college pad.  I didn't have beer cans lining my living room.  I didn't have neon beer signs in my bed room.  I didn't own a bean bag chair.  You get the point. 

Instead I had nice furniture, curtains, a wine chiller, a kitchen table with a cute center piece, flower pots on my balconies, and cute nick knacks.  I wanted my apartments to always have a cozy vibe about them.  I found it funny when the maintenance men would come in and say "Are you sure you're in college?"  It made me feel good that I was able to pull off that vibe on a VERY limited budget.

Today my budget has changed, but I still like to "decorate on the cheap".  The easiest way I have found to do this is by using jars.  I LOVE JARS!  They are so inexpensive and you might even have some in your possession right now. 

 After my grandmother passed away I found those two large jars in the back of her basement.  While I was searching I also found a box of wooden thread spools.  My grandmother saved everything!  I took the jars home and cleaned them up.  I decided to put the wooden spools in them and I made some origami stars out of scrapbook paper.  This project cost me $0 and I have something of my grandma's.

I found those rustic jar lids at a craft store for $5 each.  I bought two and put them on some Ball jars I had.  They were kind of a splurge (for me) at $5 each, but they are so cute! Those yarn balls were at Goodwill and came to a whopping dollar.  Add some fabric and you have a cheap decorative jar.  Can you imagine how much something like that would be at a craft fair?  I'm guessing at least $20 each. 


I found both of these jars at a thrift store for basically nothing.  I added my grandma's wooden beads to the larger jar for a very inexpensive way to showcase something you normally wouldn't.  The smaller jar was purchased for $2 with the buttons already in it!  I thought it was cute and went in my house, so I left them in there.

I'm convinced you can put anything in a jar and it will be cute.  Jars are a wonderful way to showcase your pantry, office supplies, school supplies, cotton balls, Q-tips, ect.  You name it, you can find a jar for it.  I love the idea that you can showcase what you already own.  There is no need to go out and spend thousands of dollars decorating your home because one man's junk truly is another man's (or woman's) treasure.  

Do you decorate with jars?  I want to know! 

This post has been linked up with Frugal Tuesday Tip!  

Don't forget to enter my giveaway HERE!!!!!